Have you ever tried to play an old video file that’s in avi format? My avi videos only played the audio, and showed a black screen. After several failed attempts to fix the problem, I finally got them working with the Microsoft Photos program. It was easy, and you can see the converted video at the end of this post.
- Update – 4/22/2025: The latest version of the Microsoft Photos program no longer includes a Video Editor. Instead, you can use the free version of Microsoft’s ClipChamp video editing program. I was able to drag my avi video into ClipChamp, and save the video in mp4 format.
Old Photos and Videos
Recently, I found a folder of photos from a trip to Niagara Falls, back in 2008.
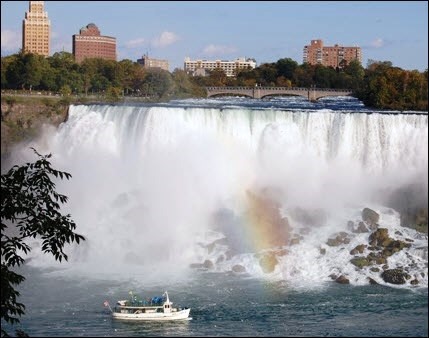
Here’s one of the photos, showing the American falls, with a rainbow, and the Maid of the Mist sailing past.
There were several videos too, all in avi format.
Usually, video files show a preview in Windows Explorer, but these videos just showed a black screen shot.
AVI Video in Default Player
To see what was in one of the old videos, I double-clicked on it.
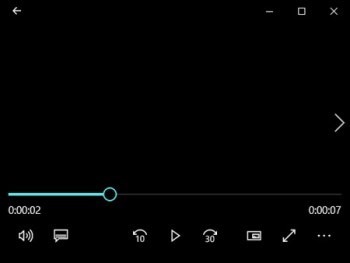
Microsoft’s default media player, Movies & TV, opened, and the video started playing automatically.
The audio was working, but the screen was black, just like it was in the preview.
Adobe Express Convert to MP4
Next, I tried Adobe Media Encoder, and that didn’t work. It just created an video with the same problem, but in a different format.
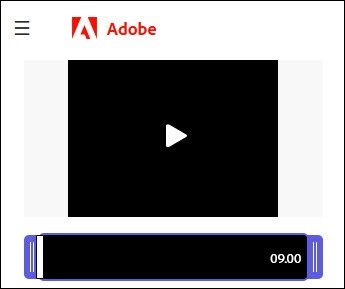
After that, I went to Adobe’s free online video converter: Adobe Express Convert AVI to MP4.
This tool was simple, and easy to use, but the result, once again, was a video with audio and a black screen.
Other Video Conversion Attempts
Next, I tried a couple of other video programs that I use – Camtasia Studio, and VLC.
They’re both excellent programs, but neither one helped me with with this avi video problem.
- Camtasia played the video, but audio only
- VLC let me try to convert the video to a different format, but the results were really poor quality. There were so many format options and video settings that I didn’t know which ones would work best.
Perhaps someone with expertise in video converting would have better luck with VLC!
Microsoft Photos
Finally, I tried the Microsoft Photos program, and finally got the avi videos working correctly! Microsoft Photos, which comes with Microsoft Windows, has a built-in Video Editor.
I often use the Video Editor to make quick video and photo montages. It’s easy to use, and you don’t have to be a professional video editor to get things done!
- Video Editor is a replacement for Microsoft’s Movie Maker (Wikipedia entry), which was discontinued in 2017. I loved that program, and used it for years.
Video Editor Fix
Here’s what you can try, to fix your avi files, and get the video showing:
- On your keyboard, press the Window key, to open the Windows Start menu
- Start typing Photos, and Windows should show programs that match what you’ve typed
- Click on the Photos app, to open it
Start a Video Project
Next, follow these steps:
- At the top of the Photos program window, click Video Editor
- In the Video Editor, click the New Video Project button
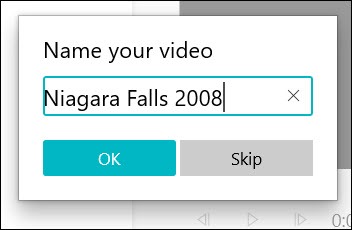
- Type a name for your project, then click the OK button
Add Your AVI Video
Next, add your problem avi video – or, add multiple videos!
To add videos:
- Drag one or more videos onto the Video Editor
OR
- Click the Add button, then browse to find the video(s) you want to add
TIP: Don’t be concerned if the video shows a black screen preview when you add it to Video Editor.
Create Your New Video
And this step is where the magic happens!
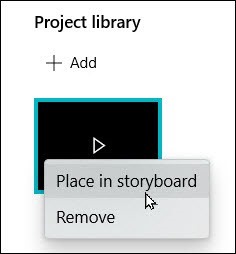
- Right-click your video
- In the pop-up menu, click Place in Storyboard
The video is added to the timeline, at the bottom of the Video Editor window.
- Note: Its screen preview is still black
The video also shows in the big video preview, at the top right of the Video Editor window.
- In the big preview, the video shows correctly!
To see the video, click the Play button, below the big preview window.
Before You Convert AVI Video
The final step is to export the video in a different format, so it will play correctly in other video players.
However, before you export the video, you might want to change the output size:
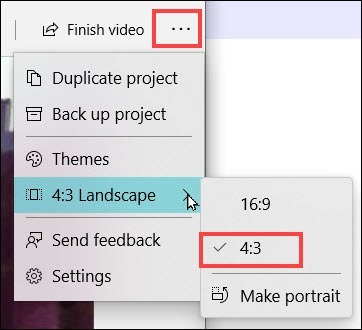
- At the top right of the Video Editor window, click the 3-dot button
- Choose the size and orientation that best match your video
My videos were Landscape, and 4:3 ratio
Export Your Video
Finally, you’re ready to export the video, using a different format
- At the top right of the Video Editor window, click the Finish Video command
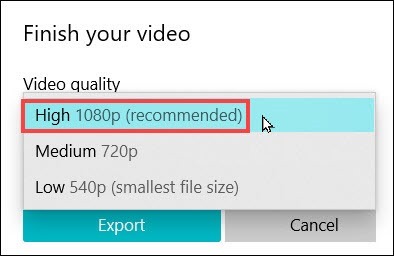
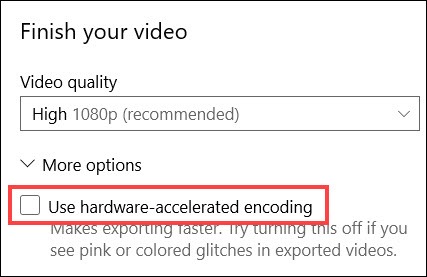
- In the Finish Video dialog box, click the arrow to see Video Quality options
- Choose the Video Quality setting you want to use
- I usually use the recommended setting of High 1080p
- Then, click the Export button, to start the video conversion
Watch the Converted Video
As soon as the video conversion is finished, the Microsoft Movies & TV program should open automatically, with your video playing.
- If the video looks great, congratulations, and you’re done!
- If the video looks a bit choppy, you can try another export, to see if you can improve it.
For the next export,
- Try a different Video Quality setting, and see how that turns out
- OR, click on More Options. Then, remove the check mark from “Use hardware-accelerated encoding”
Maybe those changes will help.
Niagara Falls Video
But sometimes, we just made blurry, shaky videos in the past, and there’s not much we can do to improve them!
It’s still fun to see those old videos though. For example, here’s the Niagara Falls video that I converted from avi format to mp4, using Microsoft Video Editor in the Photos program.
I exported with the following settings:
- Video Quality: High 1080
- 4:3 Landscape
As you can see, my old camera didn’t take high quality videos. This certainly makes me appreciate the videos that my iPhone takes now.!
P.S. Those aren’t my kids that you can hear in the background, but I love the one who says, “Whoa! Neato!” at the end of the video.
________________
How to Fix AVI Videos Audio Only Black Screen
________________


