
It’s hard work to set up a new WordPress blog, even though it’s promoted as “a few clicks and you’re done”. The bare bones might be set up in a few clicks, but there are many more steps to complete, before you’ve got a working blog. I’m making notes here, on some of the key steps, just in case I’m every foolish enough to try this again. And if you’re starting a new blog, maybe this will help you too.
A couple of weeks ago, I offered to help my son with the setup for his new blog, so he could get it up and running quickly. I’ve been blogging since 2008, so how hard could it be to start another blog? (Ha! Famous last words)
Step 1 – Choose a Domain Name
If you want to start a blog or website, you need a place to put it on the internet. In the background, number are used in the addresses, but we use friendlier domain names to find things.
My son had a a blog name in mind, so we checked the WHOIS database, and found an available domain name that matched the blog name.
We also did a free search on the KnowEm site, to see what usernames were available on the social media sites, such as Twitter, Pinterest, Instagram and YouTube. In the olden days, we didn’t have to worry about branding, but it’s important now.

Step 2 – Get Web Hosting
Next, you have to register your domain name, and get web hosting. You can do those steps separately, but I use Hostgator for my blogs (affiliate link), and usually do those steps there. I’ve found that the domain is activated faster that way, but your mileage may vary.
You can use any reputable web host for your WordPress blog – most of the big ones make it easy to install WordPress and get started.
It was easy to set up the web hosting, but it might be confusing if you hadn’t done this before. Hostgator offers all kinds of optional features, and has them checked by default. If you’re not paying attention, your basic web hosting cost could go way up!
For example, they offered an email option for $5 (I can’t remember if that was monthly or annually). You don’t need that – just set up an email account for free, in your Hostgator domain settings. They also offer a deluxe WordPress installation package, but we passed on that too.
Step 3 – Install WordPress
After you’ve paid for your domain registration and web hosting, you’ll have to wait for an email from Hostgator, with your account info, and the login details for the control panel (cPanel). That’s where you’ll go to install WordPress.
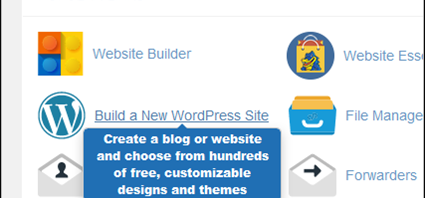
After logging in to the cPanel, I clicked the “Build a New WordPress Site” button, and followed the steps there. I won’t post the installation steps here, because they change occasionally. Check the Hostgator Support pages for the latest instructions on how to install WordPress.
Important: Be sure to write down the email address and password that you choose for your WordPress login. You’ll get a login URL where you can go later, to make some changes to the WordPress setup.

Step 4 – Set Up Email and Forwarding
The final step that I’ll cover today is setting up email for the new domain, and forwarding that email to another email address.
In the cPanel’s Popular Links section, click the Email Accounts button. Then create one or more email accounts for your new domain.
- Set up one with your name, or favourite alias, and you can use that as the contact address in your new blog.
- Be sure to set up an email address for one of the “official” addresses: admin, administrator, webmaster, postmaster, or hostmaster
I found out about those “official” addresses when I needed an SSL certificate for my Contextures site. Those are the only addresses that the authorization people will send things to.
Next, unless you want to go into Hostgator every day, to read your domain email, set up an email account forwarder for each of your new email addresses.
- In the cPanel, click the Forwarders button,
- On the Email Forwarders page, click the Add Forwarder button
- Type the email name, and then enter the destination address where you want those emails to go.
Pro Tip: Don’t do what I did, and make a typo in that destination address!

More WordPress Blog Setup Info Later
Those are the basic steps for getting started. After you follow those steps, you should be able to log in to your Hostgator cPanel, whenever you want to. You’ll also have a basic WordPress blog set up, and the information you need to log in there.
Next time, I’ll list some of the key things I do when setting up a new WordPress blog.
_________________